
ESP32 - Bluetooth Classic
The ESP32 comes with Wi-Fi, Bluetooth Low Energy and Bluetooth Classic. In this tutorial, you’ll learn how to use ESP32 Bluetooth Classic with Arduino IDE to exchange data between an ESP32 and an Android smartphone.
Video Tutorial
you can watch this video tutorial
Hardware Required
| 1 | × | ESP-WROOM-32 Dev Module | |
| 1 | × | Micro USB Cable | |
| 1 | × | Android Smartphone with Bluetooth | |
| 1 | × | Jumper Wires |
Bluetooth Terminal Application
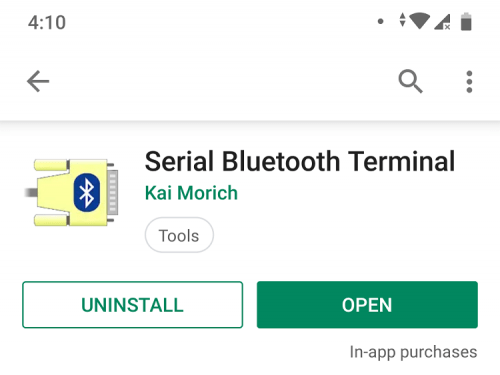
To proceed with this tutorial, you need a Bluetooth Terminal application installed in your smartphone.
We recommend using the Android app
“Serial Bluetooth Terminal”
available in the Play Store.
ESP32 Code
Serial to Serial Bluetooth
We'll program the ESP32 using Arduino IDE, so make sure you have the ESP32 add-on installed before proceeding
Open your Arduino IDE, and go to File > Examples > BluetoothSerial > SerialtoSerialBT.
The following code should load.
//This example code is in the Public Domain (or CC0 licensed, at your option.)
//By Evandro Copercini - 2018
//
//This example creates a bridge between Serial and Classical Bluetooth (SPP)
//and also demonstrate that SerialBT have the same functionalities of a normal Serial

#include "BluetoothSerial.h"

#if !defined(CONFIG_BT_ENABLED) || !defined(CONFIG_BLUEDROID_ENABLED)
#error Bluetooth is not enabled! Please run `make menuconfig` to and enable it
#endif

BluetoothSerial SerialBT;

void setup() {
  Serial.begin(115200);
  SerialBT.begin("ESP32test"); //Bluetooth device name
  Serial.println("The device started, now you can pair it with bluetooth!");
}

void loop() {
  if (Serial.available()) {
    SerialBT.write(Serial.read());
  }
  if (SerialBT.available()) {
    Serial.write(SerialBT.read());
  }
  delay(20);
}
Code Explanation
-
This code establishes a two-way serial Bluetooth communication between two devices.
-
The code starts by including the BluetoothSerial library.
#include "BluetoothSerial.h"
#if !defined(CONFIG_BT_ENABLED) || !defined(CONFIG_BLUEDROID_ENABLED)
#error Bluetooth is not enabled! Please run `make menuconfig` to and enable it
#endif
BluetoothSerial SerialBT;
SerialBT.begin("ESP32test"); //Bluetooth device name
if (Serial.available()) {
SerialBT.write(Serial.read());
}
if (SerialBT.available()) {
   Serial.write(SerialBT.read());
}
It will be easier to understand exactly how this sketch works in the demonstration.
Testing the Code
-
Upload the previous code to the ESP32. Make sure you have the right board and COM port selected.
-
The code starts by including the BluetoothSerial library.
-
This code establishes a two-way serial Bluetooth communication between two devices.
-
After uploading the code, open the Serial Monitor at a baud rate of 115200. Press the ESP32 Enable button.
-
After a few seconds, you should get a message saying: “The device started, now you can pair it with bluetooth!”.
-
Go to your smartphone and open the “Serial Bluetooth Terminal” app. Make sure you’ve enable your smartphone’s Bluetooth.
-
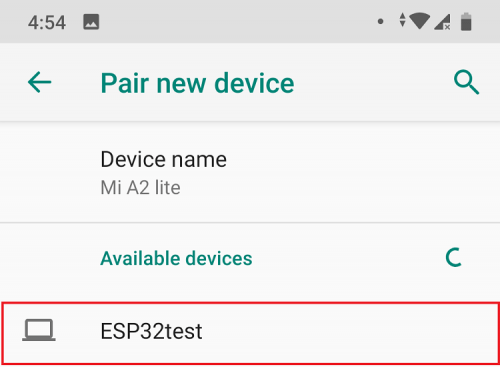
To connect to the ESP32 for the first time, you need to pair a new device.
Go to Devices. -
Click the settings icon, and select Pair new device. You should get a list with the available Bluetooth devices, including the ESP32test. Pair with the ESP32test.
-
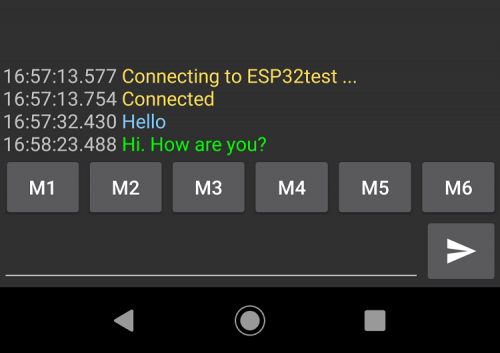
Then, go back to the Serial Bluetooth Terminal. Click the icon at the top to connect to the ESP32. You should get a “Connected” message.
-
After that, type something in the Serial Bluetooth Terminal app. For example, “Hello”.
-
You should instantly receive that message in the Arduino IDE Serial Monitor.
-
You can also exchange data between your Serial Monitor and your smartphone. Type something in the Serial Monitor top bar and press the “Send” button.
-
You should instantly receive that message in the Serial Bluetooth Terminal App.


Book Tutorial
We are considering to make the book tutorials. If you think the book tutorials are essential, you can download it. download book
References
※ NOTE THAT:
Some components works on 3.3v and others works on 5v!