
ESP32 - Serial Input/Output
We are going to learn how to:
-
How to use Serial monitor with ESP32.
Video Tutorial
you can watch this video tutorial
Hardware Required
| 1 | × | ESP-WROOM-32 Dev Module | |
| 1 | × | Micro USB Cable |
How To Use Serial Monitor
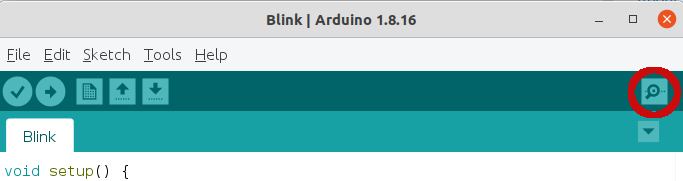
Open Serial Monitor
Click the Serial Monitor icon
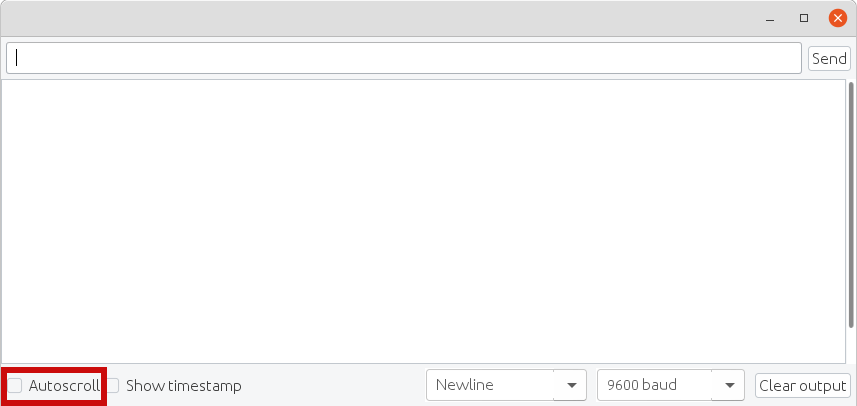
Items on Serial Monitor
-
Output console: display data received from ESP32.

-
Autoscroll checkbox: option to select between automatically scroll and not scroll.
-
Show timestamp checkbox: option to show timestamp prior to data displayed on Serial Monitor.

-
Clear output button: clear all text on the output console.

-
Baud rate selection: select communication speed (baud rate) between ESP32 and PC. This value MUST be the same as the value used in ESP32 code (in Serial.begin() function).

※ NOTE THAT:
When we select baud rate (even the value is not changed), ESP32 is reset. Therefore, this is one way to reset ESP32.
-
Textbox: user can type characters to send to ESP32

-
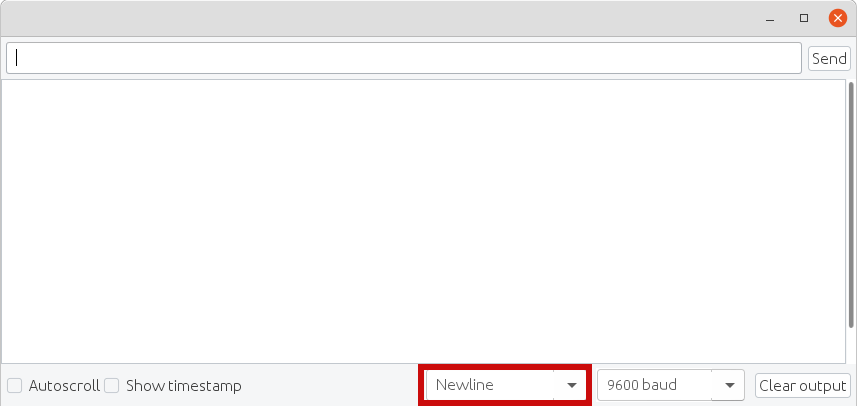
Ending selection: select the ending characters appended to data sent to ESP32. Selection includes:
-
No line ending: append nothing
-
Newline: append newline (LF, or '\n') character
-
Carriage return: append carriage return (CR, or '\r') character
-
Both NL and CR: append both newline and carriage return (CRLF, or '\r\n') characters
-
-
Send button: when the button is pressed, Serial Monitor sends data in textbox plus the ending characters to ESP32

ESP TO PC
To send data from ESP32 to PC, we need to use the following ESP32 code:
-
Set baud rate and begin Serial port by using Serial.begin() function
Serial.begin(baudrate); -
Send data to Serial Monitor using one of the following functions: Serial.print(), Serial.println(), Serial.write(). For example, send “Hello World!” to Serial Monitor
Serial.println("Hello World!");
Example Use
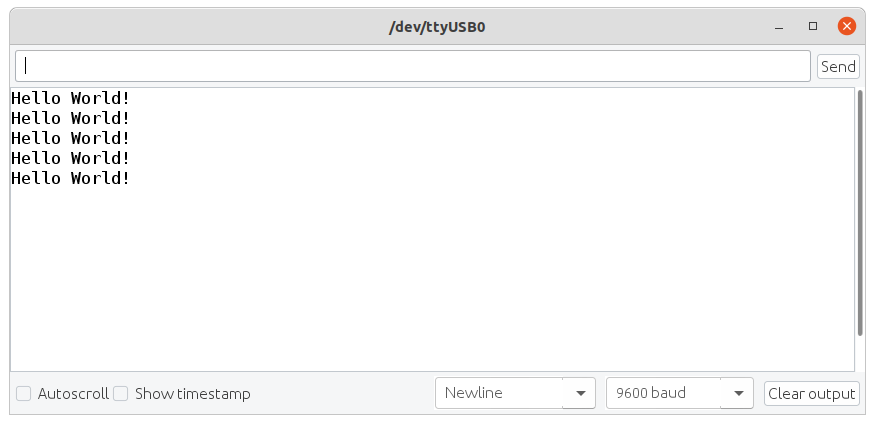
In this example, we will send the “esp32io.com” from ESP32 to Serial Monitor every second
void setup() {
  Serial.begin(9600);
}
void loop() {
  Serial.println("Hello World!");
  delay(1000);
}
Quick Steps
- power up your board
- Open Arduino IDE
- Select the right board
- Select the right port
- Copy the above code and open with Arduino IDE
- Click Upload button on Arduino IDE to upload code to ESP32
- Open Serial Monitor on Arduino IDE
- Select baurate 9600
- See the output on Serial Monitor
PC TO ESP
How to send data from PC to Aduino and read it on ESP32
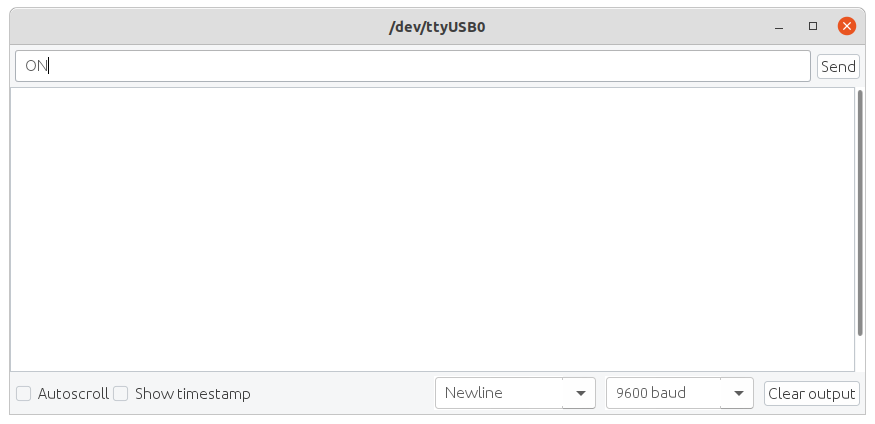
You will type text on Serial Monitor and then click Send button.
ESP32 reads data and process it. To read data, we need to use the following ESP32 code:
-
Set baud rate and begin Serial port
Serial.begin(baudrate); -
Check whether data is available or not
if(Serial.available()) { // TO DO } -
Read data from Serial port using one of the following functions: Serial.read(), Serial.readBytes(), Serial.readBytesUntil(), Serial.readString(), Serial.readStringUntil(). For example:
String data = Serial.readStringUntil("\r\n");
Example Use
In this example, we will send the commands from Serial Monitor to ESP32 to turn on/off a built-in LED. The commands include:
-
“ON”: turn on LED
-
“OFF”: turn off LED
How ESP32 can receive a complete command? For example, when we send “OFF” command, how ESP32 can know the command is “O”, “OF” or “OFF”?
When sending a command, we will append a newline character ('\n') by selecting “newline” option on Serial Monitor. ESP32 will read data until it meets the newline character. In this case, the newline character is called delimiter.
int led_pin = 13;
void setup() {
  Serial.begin(9600);
  pinMode(led_pin, OUTPUT);                                // set the digital pin as output:
}
void loop() {
  if(Serial.available())                                   // if there is data comming
  {
    String command = Serial.readStringUntil('\n');         // read string until meet newline character
    if(command == "ON")
    {
      digitalWrite(led_pin, HIGH);                         // turn on LED
      Serial.println("LED is turned ON");                  // send action to Serial Monitor
    }
    else
    if(command == "OFF")
    {
      digitalWrite(led_pin, LOW);                          // turn off LED
      Serial.println("LED is turned OFF");                 // send action to Serial Monitor
    }
  }
}
Quick Steps
- power up your board
- Open Arduino IDE
- Select the right board
- Select the right port
- Copy the above code and open with Arduino IDE
- Click Upload button on Arduino IDE to upload code to ESP32
- Open Serial Monitor on Arduino IDE
- Select baurate 9600 and newline option
- Type “ON” or “OFF” and click Send button
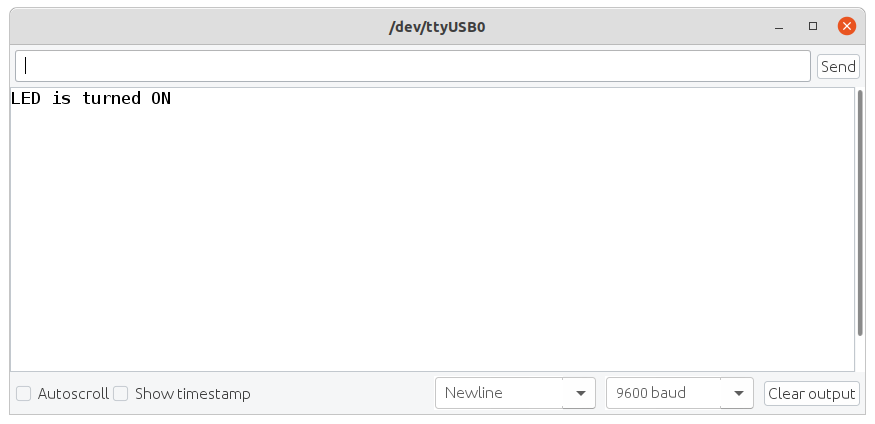
- See your LED state. We will see LED's state is ON or OFF, respectively.
- We also see LED's state on Serial Monitor
Code Explanation
-
configure an ESP32's pin to digital output mode by using pinMode() function.
-
program the pin to GND to turn off led by using digitalWrite(pinNumber,LOW)
-
program the pin to VCC to turn on led by using digitalWrite(pinNumber,HIGH)
Read the line-by-line explanation in comment lines of source code!
※ NOTE THAT:
The above code uses the delay(). This function blocks ESP32 from doing other tasks during the delay time. If your project requires to do some tasks, avoid blocking ESP32 by using the non-blocking method for ESP32.
Book Tutorial
We are considering to make the book tutorials. If you think the book tutorials are essential, you can download it. download book
See Also
References
※ NOTE THAT:
Some components works on 3.3v and others works on 5v!